| Journal | Radio Cabinet Upcycle
Retro Restoration— Radio Cabinet

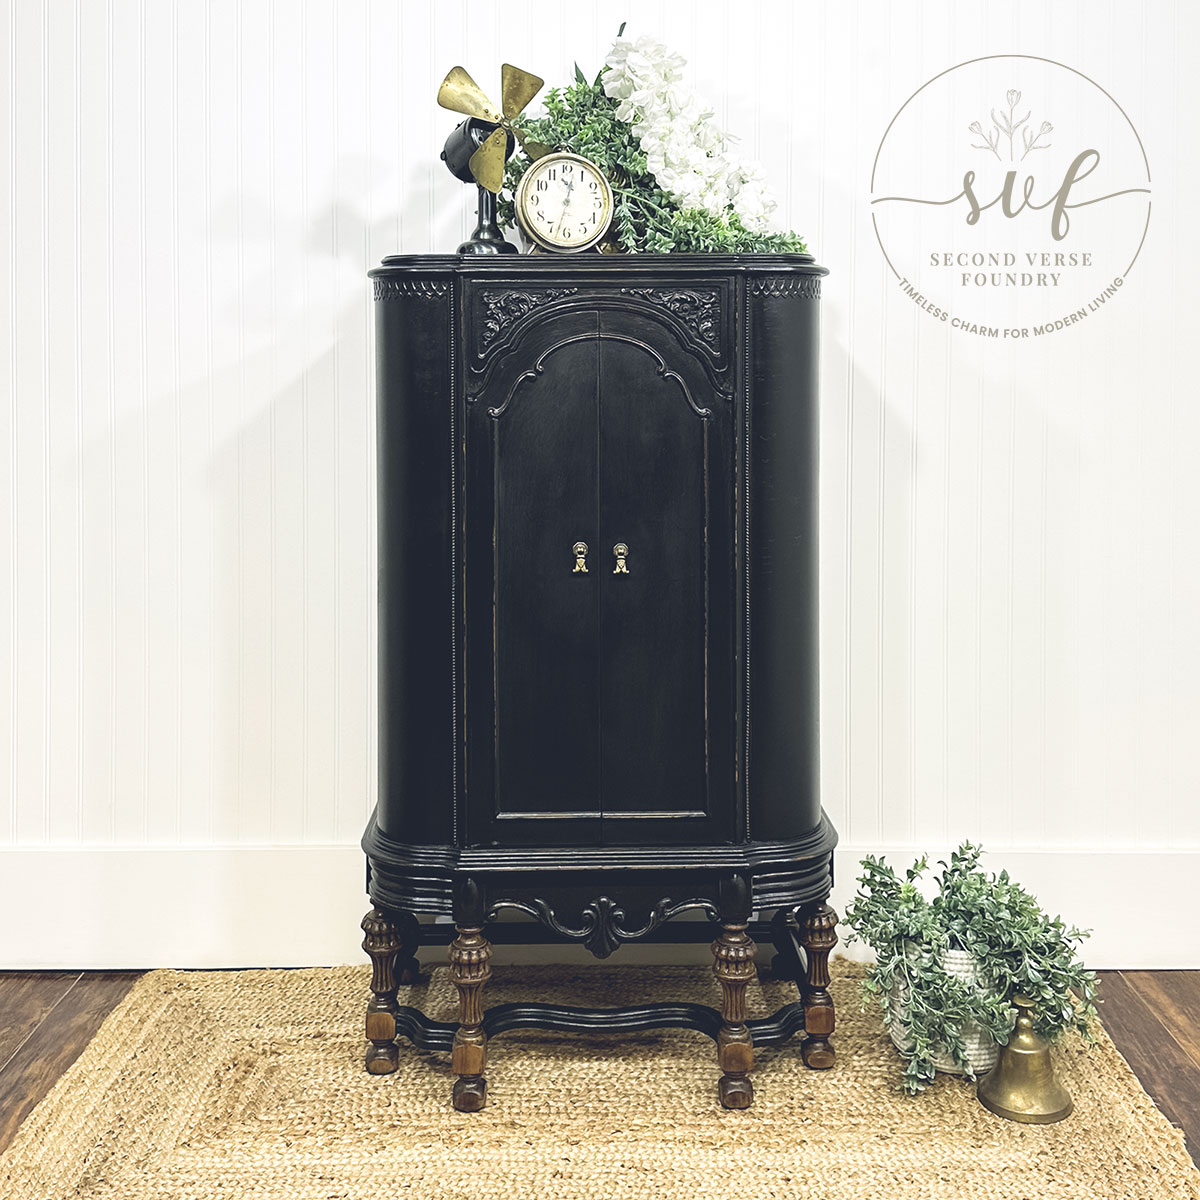
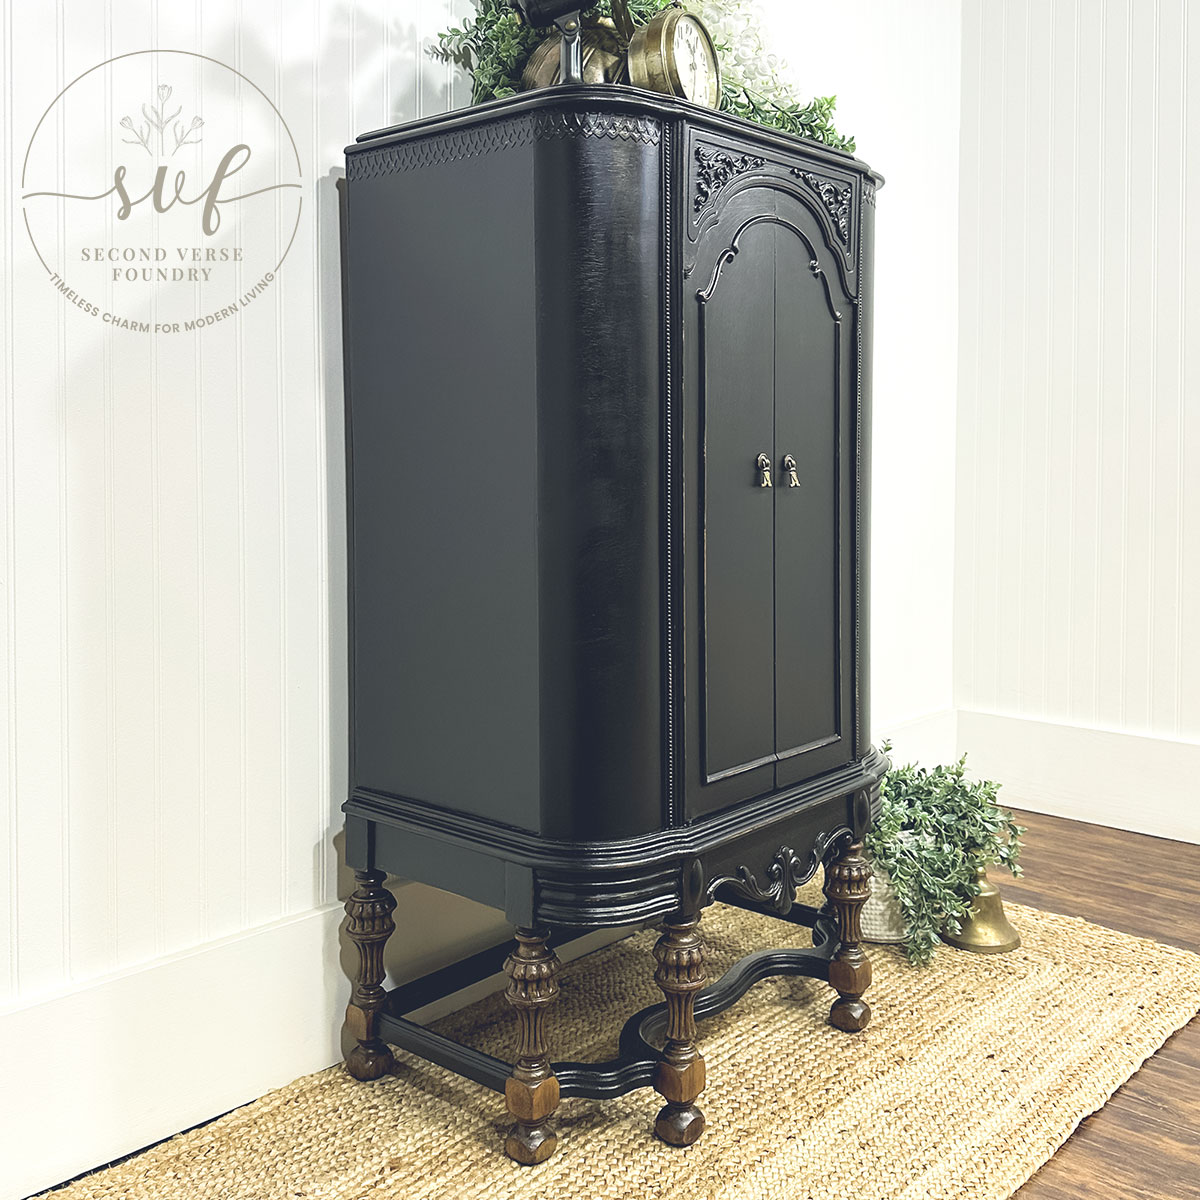
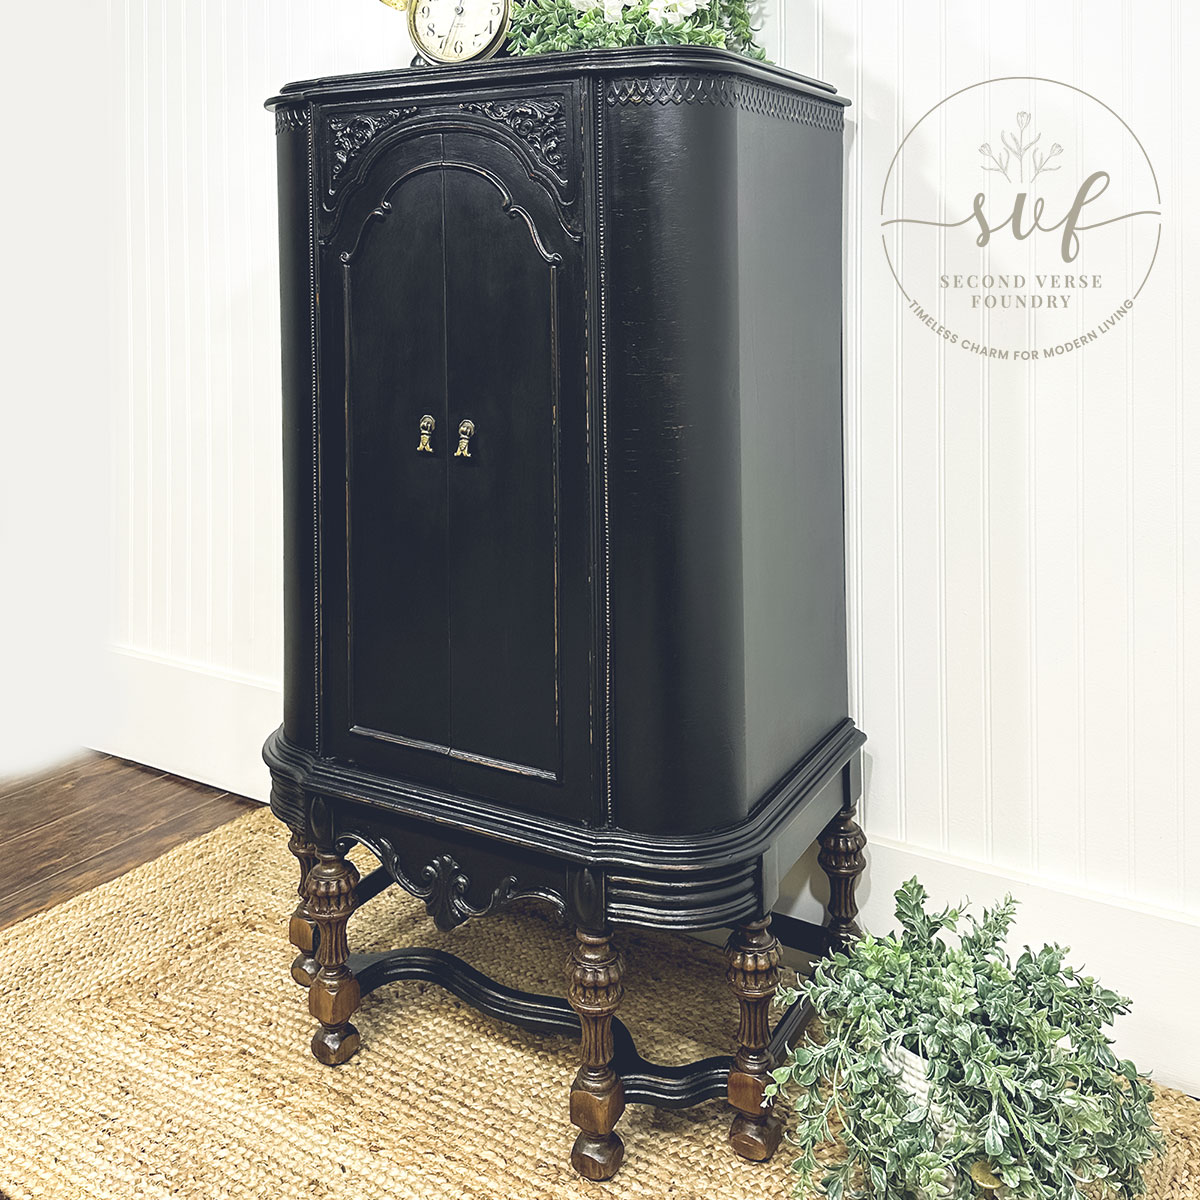
The unique design, vintage appeal, and compact versatility make an antique radio cabinet a standout piece for any home. With their rich history and timeless charm, these cabinets can be transformed into everything from a linen cupboard to a stylish mini bar. This particular cabinet, with its sturdy frame and classic silhouette, had so much potential—but it was time for a refresh. A deep Coal Black milk paint finish, paired with a warm wood stain, gave it a bold yet elegant new look. Now, with a little creativity and careful craftsmanship, this radio cabinet upcycle has a fresh new purpose.
Radio Cabinet Upcycle
I purchased this cabinet from another local Manitoba furniture flipper! Although he had good intentions, he simply needed to downsize his queue, which I can certainly relate to! One can easily get out of hand with furniture stockpiling! Lucky for me, I came across his ad moments after he posted it! I picked it up on a stormy Manitoba winter evening on my attempted way home from the city with a load of groceries. Turned out that I couldn’t make it home after all, as the highways running out of the city were all closed!


So many upcycle options for these oh-la-la antique radio cabinets! Display Shelf | Linen Cupboard | Mini Bar | Wine Cabinet | Book Case | Magazine Storage | Lavatory Cupboard | Front Foyer Statement! An abundance of possibilities! I personally think this one could be ultra charming in a bathroom for storing extra linens and toiletries! A moderately sized timeless piece, well-suited for even the smallest of spaces. This piece pre-sold to Jane just yesterday— she saw my earlier posts, and directly contacted me to pre-purchase. Thank you dear Jane!

All products mentioned in this post—and every post I share—are ones I regularly reach for. They’ve earned a spot in my toolbox because they’re reliable and deliver results. Simply what I use, trust, and recommend, shared honestly with you. No affiliate links, no commissions—just straight talk from my whole heart.
Homestead House Paint Co.
Featuring
These are the products that brought this transformation to life—ones I trust, recommend, and share honestly with you. Select any to explore other projects for inspiration and see where to buy.

My Step-by-Step Transformation
These are the steps that brought this transformation to life—shared to guide and inspire your own project. Learn better by talking it through? Let’s connect for a consultation to bring your vision to life.
- Removed original drop-pulls— Which was somewhat difficult given how they had been installed
- Filled original hardware holes— With Bondo, and got to thinking that I might replace with some alternate drop-pulls
- Attempted to remove doors— For ease of paint application, the screws however were far too stripped, so I opted to leave installed
- Lightly sanded down both exterior and interior body— To Remove flaking finish
- Heavily sanded down top and legs— With thought that I might stain for a two-toned transformation
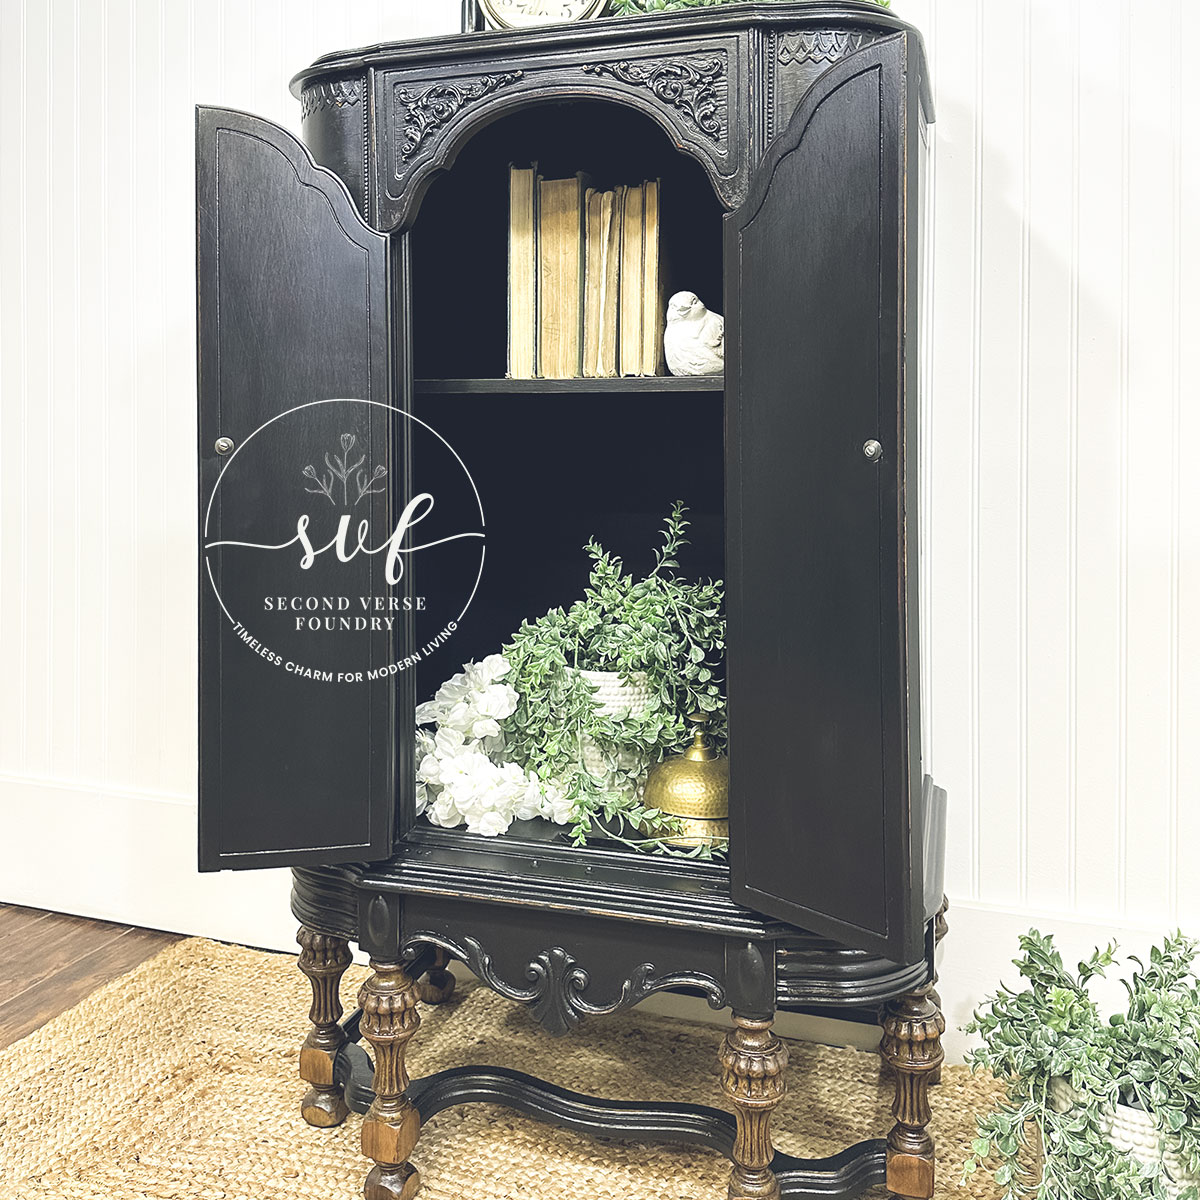
- Measured and cut a new shelf and back— The radio had already been removed, and a new shelf and back were needed
- Vacuumed and washed— In preparation for paint application
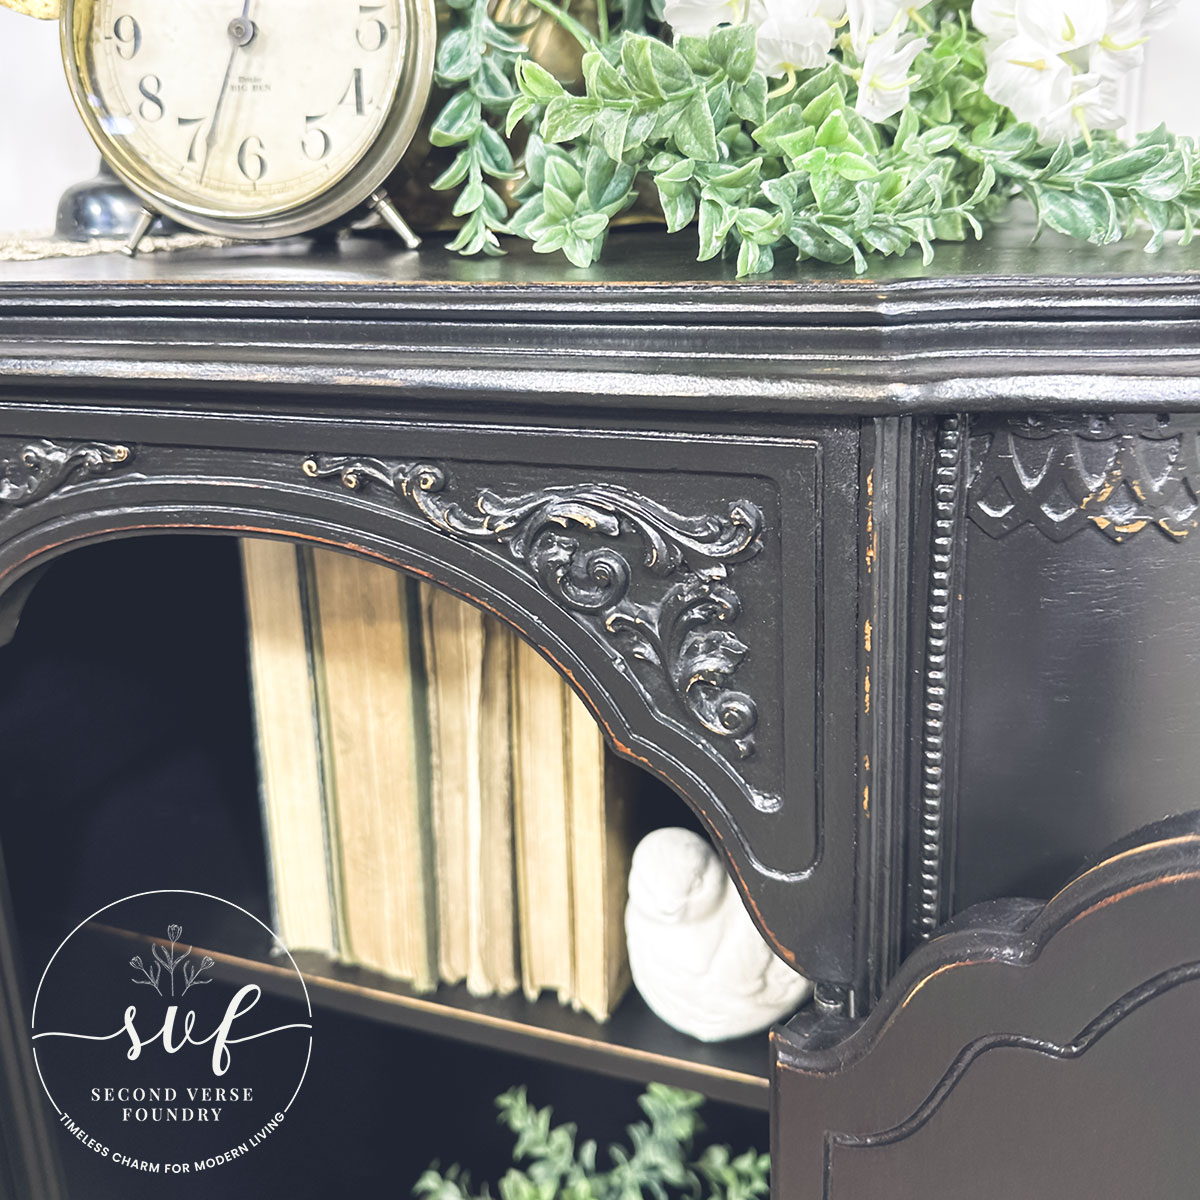
- Applied 2 coats of Homestead House milk paint in the colour Coal Black w/ paint brush application to the exterior, interior, new shelf, and new back— This classic bold and deep colour is a staple in any household
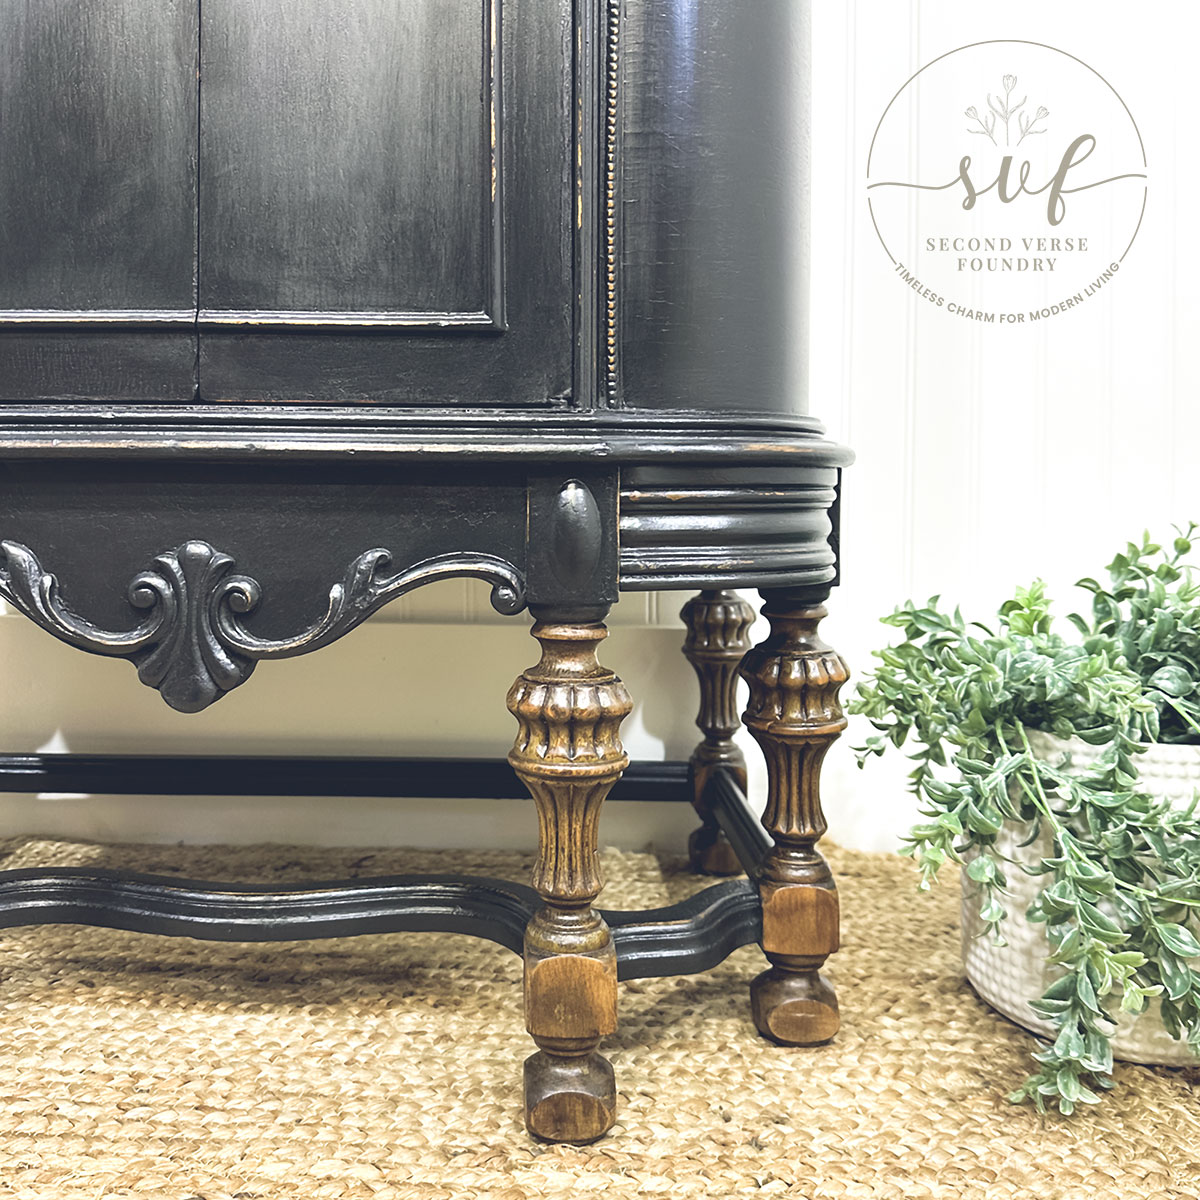
- Lightly sanded down giving extra attention to edges— For a farmhouse distressed finish; with 220 grit
- Vacuumed— In preparation for stain and sealant
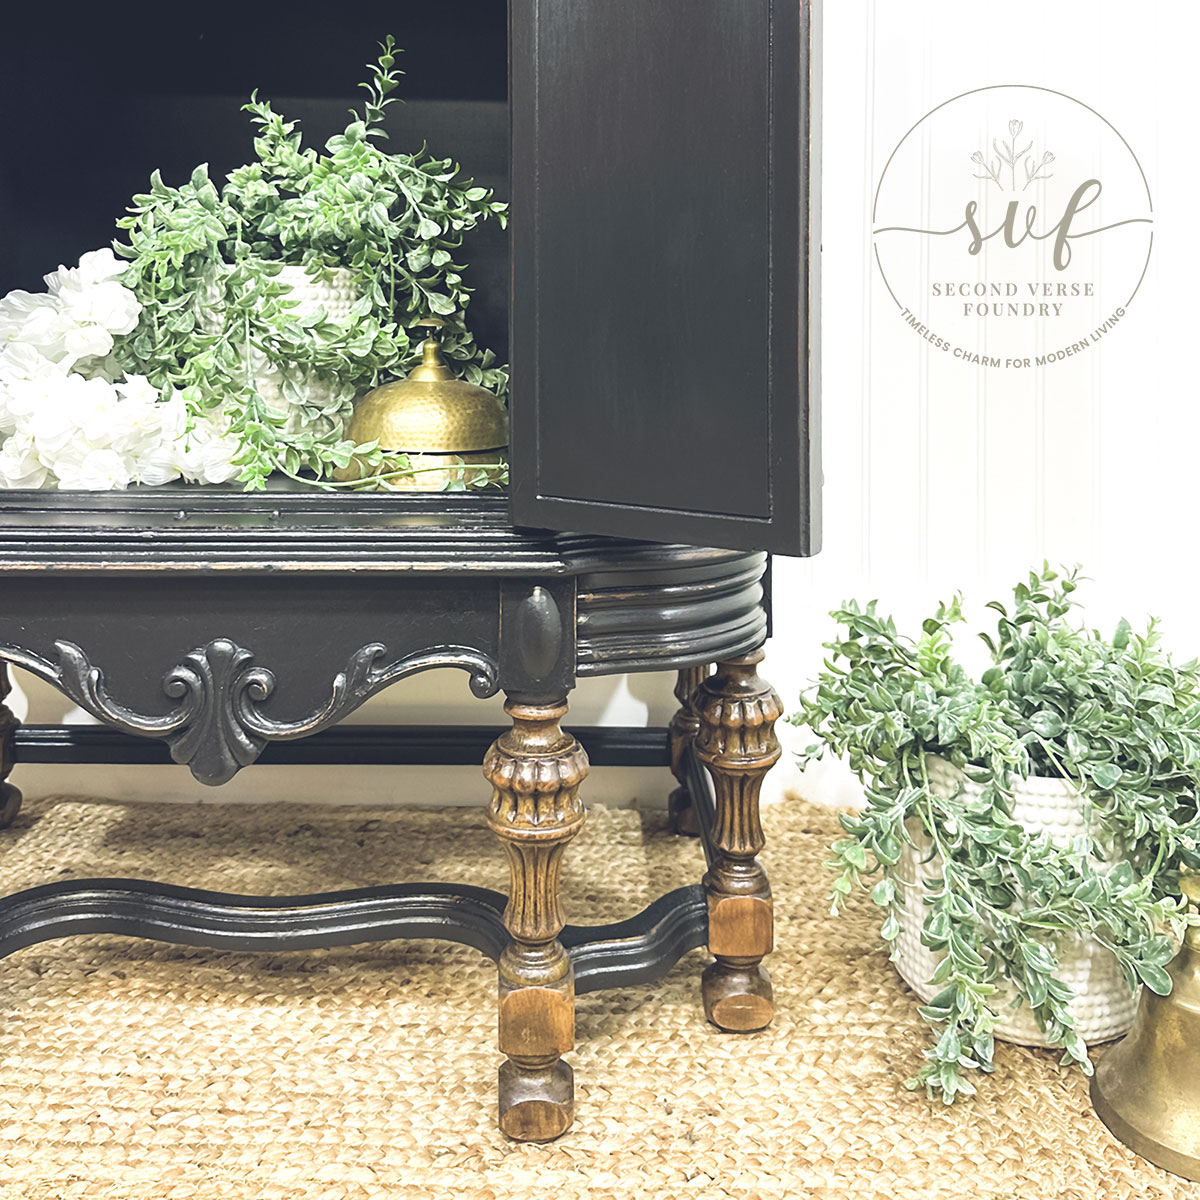
- Applied 2 coats of Fusion Stain & Finishing Oil (SFO) in the colour Natural ~ A wood conditioner, stain and top coat all in one; I absolutely adore how this product finishes over top of milk paint; paint brush application/rag wipe
- Applied 1 coat of Minwax Gel Stain in the colour Aged Oak to the legs— For a two-toned exposed wood transformation; sponge application/rag wipe
- Applied 2 coats of Minwax Wipe-On Poly in Clear Satin to the legs— To achieve a highly durable finish; sponge application
- Drilled new holes and reinstalled original drop-pulls— Thus why you might notice that they’re sitting a bit higher than they were originally 😉
One-Hour / One-on-One / $80
Looking to achieve a similar look? Getting started with furniture transformations can feel overwhelming, but with hands-on experience since 2017, I’ve learned so much along the way. I’d love to share what I know and help guide you through the process.
Let’s work together! Whether it’s over the phone, via a screen-share session, or even over a coffee (or wine!), we’ll make a plan to bring your vision to life.


With all my heart and hands
Transforming this radio cabinet upcycle was more than just a refresh—it was about reimagining a piece that still had so much to offer. With its classic design and compact versatility, it was ready for a new purpose while keeping its vintage charm intact. A thoughtful update gave it a fresh, functional look, proving that even well-worn furniture can be revived with the right vision.
If you have a piece that feels outdated, don’t be too quick to part with it. A little creativity and a fresh perspective can turn something forgotten into something truly special—blending the past with the present in a whole new way.
Some pieces aren’t just furniture—they’re part of a home’s history. This radio cabinet upcycle wasn’t just about updating its style, but about giving it a new place to belong. It’s a reminder that even as trends change, well-made pieces can be transformed to fit beautifully into modern spaces.
Whether you’re here for inspiration or simply passing through, I hope this project sparks ideas for your own upcycles. There’s always more to create, and I can’t wait to share what’s next.
Faye Caroline
0 Comments